How-to
How to Slice Homemade Bread Evenly Without Crushing It
To slice homemade bread evenly without crushing it, let the loaf cool completely, use a serrated bread knife at least 9 inches long, and saw with long, light strokes while the knife's weight does the work. For identical slices every time, add a slicing guide; for slices thinner than about 0.4 inch, a hand-crank slicer is the better tool.
Disclosure: This page contains affiliate links (marked with *). If you buy through them, we earn a small commission at no extra cost to you. As an Amazon Associate I earn from qualifying purchases. Learn more
The short version
Cool the loaf completely first – King Arthur Baking says so in its sandwich bread recipe, and America's Test Kitchen explains that the starches need time to set. Then use a serrated knife of at least 9 inches, long back-and-forth strokes and minimal downward pressure. A slicing guide keeps the thickness the same; a crank slicer goes thinner.
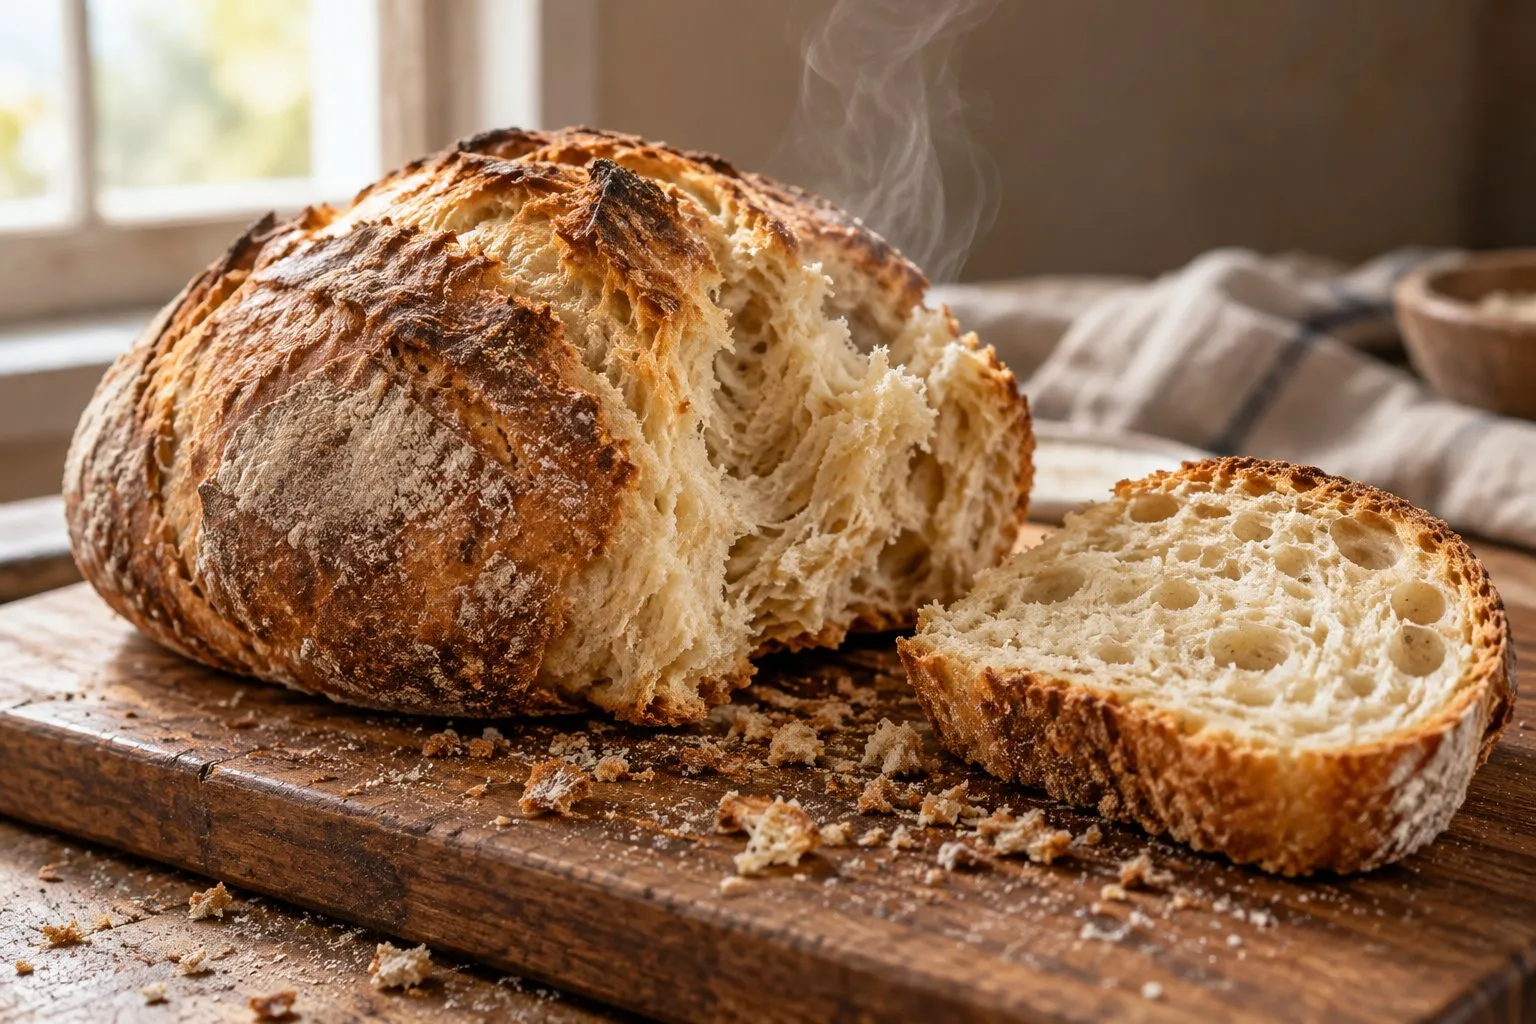
What you get and what it takes
The result is a loaf of slices with straight faces, an intact crumb and a similar thickness from end to end. It takes no special skill, but it does take time: the longest step is waiting for the loaf to cool. With a guide, the evenness comes from the frame; with a knife alone, it comes from repetition.
What you need
- A serrated bread knife of at least 9 inches. That is America's Test Kitchen's minimum, and its favorite is the Mercer Millennia 10-inch wide bread knife. The knife should also be longer than your loaf is wide.
- A stable board that does not slide on the counter.
- Optional: a slicing guide that fits your loaf, if you want every slice the same.
- A cooling rack – the loaf needs air on all sides while it cools.
Mercer Millennia 10" bread knife
A 10-inch wavy-edge bread knife from a foodservice cutlery maker – the tool every slicing guide needs.
Why here: The 10-inch wavy-edge knife that America's Test Kitchen names as its favorite – long enough for most homemade loaves and needed for any slicing guide.
Best for: Anyone who slices with a guide or freehand and needs a long serrated knife for crusty loaves and bagels on a board.
Strengths
- 10 in (25.4 cm) blade of one-piece high-carbon Japanese steel, 15° edge, HRC 53–54 (manufacturer)
- Wavy edge meant to get through a tough crust without tearing the soft crumb (manufacturer)
- Santoprene handle with finger guard, NSF certified, limited lifetime warranty (manufacturer)
Weaknesses
- Hand wash only – Mercer says cutlery should never go in a dishwasher
- No fence: slice thickness depends on your hand unless you add a guide
- Type
- Serrated (wavy edge) bread knife
- Blade
- 10 in (25.4 cm), high-carbon Japanese steel, 15° edge, HRC 53–54
- Slice thickness
- freehand – set by your hand or a slicing guide
Price class: Budget
View on Amazon(paid link to Amazon, opens in a new tab)Ad · paid link · check price & delivery on AmazonAdAccording to Mercer, the M23210 has a 10-inch (25.4 cm) blade of high-carbon Japanese steel with a wavy edge whose teeth get through a tough crust, and a Santoprene and polypropylene handle. Mercer advises hand washing and does not recommend the dishwasher.
Step by step
Let the loaf cool completely
King Arthur Baking's white sandwich bread recipe says to let the bread cool completely before slicing. America's Test Kitchen explains why: warm bread has a crisp crust but a gummy interior, and cooling gives the starches time to set. Slicing too early is the main reason for a torn, squashed slice like the one in the picture above.Choose a long serrated knife
Use a serrated knife at least 9 inches long. A short blade has to be pushed down instead of drawn through, and that is what crushes a soft crumb.Set up a steady board and, if you like, a guide
Lay the loaf on a board that does not move. If you use a guide, measure the loaf first: the Akebono PS-955, for example, takes loaves up to about 7.9 inches tall and 5.5 inches wide. A domed sandwich loaf can rise well above its pan, so measure the baked loaf, not the pan.Saw with long, light strokes
Start at the top crust and use the full length of the blade in long back-and-forth strokes. America's Test Kitchen advises letting the weight of the knife work and using minimal downward pressure. Pressing down is what flattens the loaf.Finish through the bottom crust
Keep sawing until the blade is through the bottom crust. If you push the last bit, the crust breaks off unevenly. Keep the fingers of your holding hand on top of the loaf and away from the blade.Repeat at the same distance
With a guide, move the loaf by one step and repeat. Without one, start each cut at the same distance from the cut face. Look at the first two slices and correct the angle before you slice the rest.
How to slice bread evenly every time
A knife alone gives even slices only with a steady hand. A slicing guide fixes the distance: the Akebono PS-955 has five steps from 10 to 30 mm (about 0.4 to 1.2 inch); budget plastic guides such as the Kiss Core slicing guide* list adjustable width but no thickness steps. The guides are compared on the bread slicing guide page, and which thickness suits which bread is on slice thickness.
How to slice bread thin
Thin slices are where knives and guides reach their limit. The thinnest step of the Akebono guide is 10 mm (about 0.4 inch). For thinner sandwich slices, a hand-crank bread slicer sets its fence steplessly – the Zassenhaus Classic from 1 to 18 mm, according to Culinaris.
Typical mistakes
- Slicing while warm. The crumb is still setting; wait until the loaf is cool all the way through.
- Using a short or straight-edged knife. It has to be pushed instead of drawn, which crushes the crumb.
- Pressing down. Light strokes, no pressure – the teeth do the cutting.
- Using a guide that is too small. A loaf that is taller than the guide walls leaves the top crust unguided.
- Changing the angle mid-loaf. Slices get wedge-shaped; check the first two before you go on.
Safety
The blade is the only risk. Keep the holding hand on top of the loaf and away from the cutting line, and slow down at the last few slices, where the end piece is small. Wash the knife by hand, rinse it and dry it thoroughly, as Mercer advises – a knife hidden in a sink full of water is a hazard of its own.
Other loaves
Sourdough has a harder crust and a more open crumb; the technique differs in the details and is covered in how to slice sourdough, with the cooling question in when to cut sourdough. Tall, square loaves are covered in how to slice bread-machine bread. Knives for crusty loaves are compared in bread knife for sourdough.
When a slicer is worth it
If you bake several times a week, the time and evenness of a slicer add up. Which slicer fits which homemade loaf – a crank slicer for crusty rounds, a guide for pan loaves – is laid out in bread slicer for homemade bread. The whole range of devices is on the manual bread slicer overview.
Questions readers ask
How long should homemade bread cool before slicing?
Until it is completely cool. King Arthur Baking's white sandwich bread recipe says to let the bread cool completely before slicing, and America's Test Kitchen explains that warm bread has a gummy interior because the starches have not set yet. The exact time depends on the size of the loaf; a large crusty loaf takes longer than rolls.
Is there a trick to slicing homemade bread?
Three things matter more than any trick: a fully cooled loaf, a long serrated knife and almost no downward pressure. America's Test Kitchen recommends a serrated knife at least 9 inches long and long, smooth strokes that let the weight of the knife do the work. A slicing guide adds even thickness.
How do you slice bread thin and even?
With a knife alone, thin and even slices are hard to repeat. A slicing guide sets fixed steps – the Akebono PS-955 starts at 10 mm (about 0.4 inch). For thinner slices, a hand-crank slicer sets the fence steplessly, the Zassenhaus Classic from 1 mm.
How do you slice bread without a bread slicer?
With a long serrated bread knife and patience: cool the loaf completely, hold it steady with your free hand well away from the blade, and saw with light strokes. For even thickness, start each cut at the same distance from the last cut face. A guide or crank slicer only becomes worth it if you slice often.
Sources we read
- America's Test Kitchen: How to slice bread
- King Arthur Baking: White Sandwich Bread recipe (pan size, cooling)
- Mercer Culinary: Millennia Wavy Edge Wide Bread Knife 10" M23210 (product page)
- Globalkitchen Japan: Akebono bread slicer PS-955 (technical data)
- Culinaris: Zassenhaus Bread slicing machine Classic (technical data)
Keep reading
- Buying guideHomemade breadWhich bread slicer fits homemade bread? Crank slicer or slicing guide, matched to your loaf size, slice thickness and baking rhythm – compared by spec sheet.
- Buying guideBread slicing guidesBread slicing guides compared by spec sheet: thickness steps, loaf size, knife or no knife, plastic or bamboo – and when a guide is the wrong tool for your loaf.
- How-toHow to slice sourdoughHow to cut sourdough bread evenly: cool the loaf, halve a round boule, saw with a long serrated knife – plus the method for guides and hand-crank slicers.
- How-toSlicing bread-machine breadHow to slice bread machine bread: take the loaf out right away, cool it at least 30 minutes, remove the paddle, then cut with a serrated knife or a guide.
- ExplainerSlice thicknessHow thick is a slice of bread? There is no US standard; bakery slicers cut 1/2 to 1 inch at fixed settings. What home slicers and guides reach, in inches and mm.
Who compares here
manualbreadslicer.com Editorial Team
Bread slicer comparisons & explainers
We are the editorial team at manualbreadslicer.com. We compare hand-crank bread slicers, slicing guides and their electric alternatives using manufacturer spec sheets, manuals, retailer data and primary sources such as Lemelson-MIT – with sources on every page. We do not run lab tests, and we say so openly.
- Spec sheets & manuals compared
- Sources on every page
- No lab tests – stated openly
- Publisher details in the imprint