How-to
How to Slice Bread Machine Bread: Cooling, the Paddle Hole and Turning the Loaf
Take the loaf out of the pan as soon as the bake ends, let it cool on a wire rack for at least 30 minutes, pull out the kneading paddle if it stayed in, and only then slice with a serrated knife – ideally in a slicing guide that fits the loaf. That is the sequence Cuisinart's bread maker manual describes, and it prevents most squashed and torn slices.
Disclosure: This page contains affiliate links (marked with *). If you buy through them, we earn a small commission at no extra cost to you. As an Amazon Associate I earn from qualifying purchases. Learn more
The short version
Remove the loaf from the pan right after baking, cool it on a wire rack for 30 minutes or longer, and take out the kneading paddle with the hook if it is still in the bottom. Measure the loaf, set it in a guide that fits, or on a board, and cut with a long serrated knife in gentle strokes. Removing the paddle before the last rise avoids the hole.
What's on this page
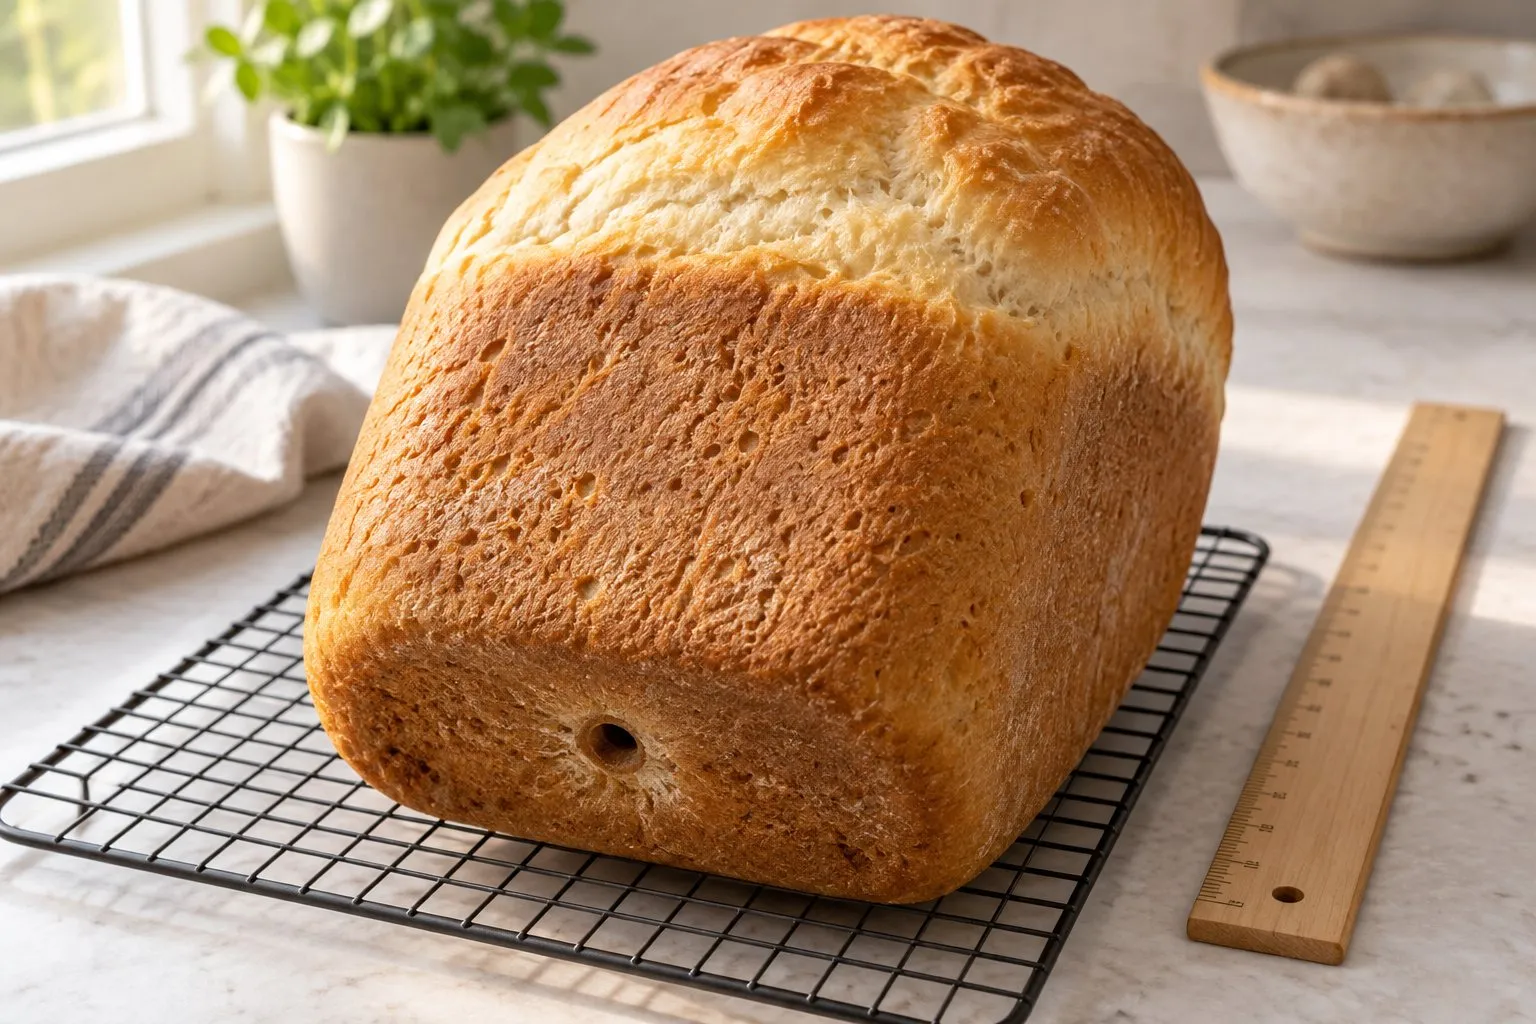
Bread machine loaves have three features that make slicing harder than with a store-bought loaf: a soft, tall crumb, a domed top and – unless you remove it – a paddle hole in the bottom. Result: even slices without a squashed top. Effort: about 30 minutes of cooling, then a few minutes of cutting. Tools: wire rack, oven mitts, the paddle removal hook that comes with many machines, a long serrated bread knife and, optionally, a slicing guide.
Which slicers fit a tall loaf at all is the question on the parent page, bread slicer for bread machine loaves. This page is about the technique.
Step by step
Remove the paddle before the last rise (optional)
Cuisinart's CBK-110 signals with 10 short beeps when kneading is done. At that point you can pause the program, take out the dough, remove the kneading paddle, form the dough into a neat ball and put it back. The manual says this avoids the small hole in the bottom of the loaf; neither step is necessary.Take the loaf out as soon as it is done
After baking, the machine keeps the bread warm for 60 minutes. For best results, the manual recommends taking the loaf out right away: lift the pan with oven mitts and shake it until the bread is released.Cool it on a wire rack
The instruction section says 20 to 30 minutes on a wire rack before slicing; the recipe section says all breads slice best after a minimum of 30 minutes, preferably longer. Use the longer value for tall 2-lb loaves.Take out the paddle if it stayed in
If you did not remove it earlier, lift the paddle out of the cooled loaf with the paddle removal hook: the end of the hook on top of the paddle, then a gentle pull. Do it before slicing so the knife never meets the metal.Measure and position the loaf
Measure height at the top of the dome and width at the widest point. Then choose a guide that fits, or a board.Slice with long, light strokes
Use a long serrated knife and let the teeth cut; pressing down crushes the soft top. In a guide, keep the blade flat against the slot.
Turning the loaf to fit a guide
A slicing guide limits height and width separately. The Akebono PS-955 takes loaves up to 200 mm high and 140 mm wide (about 7.9 × 5.5 in). Turning a loaf on its side swaps the two numbers. A loaf that is wider than it is tall – say 6.5 inches wide and 5 inches high – does not fit upright, because it is wider than 5.5 inches, but it fits on its side: 5 inches wide and 6.5 inches high. A loaf that is taller than 7.9 inches and wider than 5.5 inches fits neither way. Then you need a slicer without side walls; see guide or hand-crank slicer.
Akebono PS-955 guide
A compact Japanese slicing guide with five fixed thicknesses and a crumb tray – you bring your own bread knife.
Why here: The guide whose maker states the loaf limit, so you can check a bread machine loaf against 7.9 × 5.5 inches – upright or on its side.
Best for: Sandwich and pan loaves up to 7.9 in tall and 5.5 in wide, sliced with your own bread knife.
Strengths
- Five settings: 10, 15, 20, 25 and 30 mm (about 0.4 to 1.2 in)
- Light: about 13 oz (374 g), 9.3 × 6.3 × 2.7 in – fits a drawer
- Removable crumb tray, made in Tsubame, Japan
Weaknesses
- No knife included
- Loaf up to about 7.9 in high and 5.5 in wide – too narrow for most round boules
- Hand wash only; plastic parts heat-resistant to 70–120 °C (158–248 °F) per part
- Type
- Slicing guide for a bread knife
- Blade
- none – bread knife sold separately
- Slice thickness
- 10 / 15 / 20 / 25 / 30 mm (about 0.4–1.2 in)
- Loaf size
- up to 7.9 in high × 5.5 in wide (200 × 140 mm)
- Size
- 9.3 × 6.3 × 2.7 in (235 × 159 × 69 mm)
- Weight
- about 13 oz (374 g)
Price class: Budget
View on Amazon(paid link to Amazon, opens in a new tab)Ad · paid link · check price & delivery on AmazonLearn more AdThe Akebono has five fixed slots of 10, 15, 20, 25 and 30 mm (about 0.4 to 1.2 in) and a removable crumb tray; no knife is included. Its plastic parts are rated heat-resistant to between 70 and 120 °C (158–248 °F) depending on the part, one more reason to cool the loaf first. If your loaves vary in width, an adjustable guide such as the Kiss Core* widens the gap, but its listing states no maximum height. All guides are compared on bread slicing guides.
The knife
Bread machine bread has a thin crust and a soft crumb, so a serrated edge matters more than force. Mercer Culinary describes the wavy edge of its 10-inch Millennia bread knife as getting through a tough crust without tearing the soft interior. A blade longer than the loaf is wide lets you finish each slice in long strokes instead of short sawing. Knife choice for crusty loaves is covered on bread knife for sourdough.
Common mistakes
| Mistake | What happens | Fix |
|---|---|---|
| Slicing straight out of the machine | The crumb squashes and tears | Cool at least 30 minutes on a rack |
| Leaving the loaf in Keep Warm | The manual recommends taking it out right after baking | Take it out when the bake ends |
| Cutting with the paddle still inside | The knife hits metal at the bottom | Lift it out with the hook first |
| Pressing down on the dome | Flattened, uneven slices | Long, light strokes, let the teeth cut |
| Forcing a loaf into a guide | Crushed sides, slices that wander | Measure first; turn it or use a board |
Safety
The paddle and pan are extremely hot right after baking – Cuisinart's manual tells you to use oven mitts and to take care with the paddle. With a knife, keep the hand that holds the loaf on top and behind the blade path. On a hand-crank slicer, the risk is the last piece of the loaf, where fingers come close to the blade; use the carriage or end-piece holder if your slicer has one.
More on slicing any homemade loaf is on how to slice homemade bread, and the overview of manual bread slicers is on the homepage.
Questions readers ask
How long should bread machine bread cool before slicing?
Cuisinart's manual for the CBK-110 bread maker recommends cooling the loaf on a wire rack for 20 to 30 minutes before slicing, and its recipe section says all breads slice best after a minimum of 30 minutes, preferably longer. Cut earlier and the soft crumb tends to squash. If you want warm bread, the manual suggests reheating it wrapped in foil in the oven.
How do I get the kneading paddle out of the loaf?
Wait until the bread has cooled, then lift the paddle out with the paddle removal hook, as Cuisinart's manual describes: set the end of the hook on top of the paddle and pull gently. The paddle is extremely hot right after baking. To avoid the hole altogether, take the paddle out of the dough at the Remove Paddle signal before the last rise.
How do I use a bread slicer for bread machine bread?
Measure the cooled loaf first. A slicing guide only works if the loaf is lower and narrower than its walls – the Akebono PS-955 takes up to 7.9 inches high and 5.5 inches wide. Set the loaf against the end stop, pick the slot and saw with a long serrated knife without pressing down. Hand-crank slicers state no loaf limit, so check the fit with the loaf itself.
Sources we read
Keep reading
- CompatibilityBread-machine loavesDoes a bread slicer fit a tall 2 lb bread machine loaf? What makers state about loaf size, what they leave out, and how to measure before you buy.
- Buying guideBread slicing guidesBread slicing guides compared by spec sheet: thickness steps, loaf size, knife or no knife, plastic or bamboo – and when a guide is the wrong tool for your loaf.
- How-toHow to slice homemade breadHow to slice homemade bread evenly: cool it completely, use a serrated knife of at least 9 inches, saw with little pressure – and when a guide or crank slicer helps.
- Buying guideSourdough bread knifeWhich sourdough bread knife cuts a crusty boule cleanly? Blade length, serrated edges and bow knives explained, with our pick and the alternatives compared by spec.
- ComparisonGuide vs. hand crankBread slicing guide or hand-crank slicer? How loaf width, height, how often you slice, storage and price class decide – compared by spec sheet, not by opinion.
Who compares here
manualbreadslicer.com Editorial Team
Bread slicer comparisons & explainers
We are the editorial team at manualbreadslicer.com. We compare hand-crank bread slicers, slicing guides and their electric alternatives using manufacturer spec sheets, manuals, retailer data and primary sources such as Lemelson-MIT – with sources on every page. We do not run lab tests, and we say so openly.
- Spec sheets & manuals compared
- Sources on every page
- No lab tests – stated openly
- Publisher details in the imprint